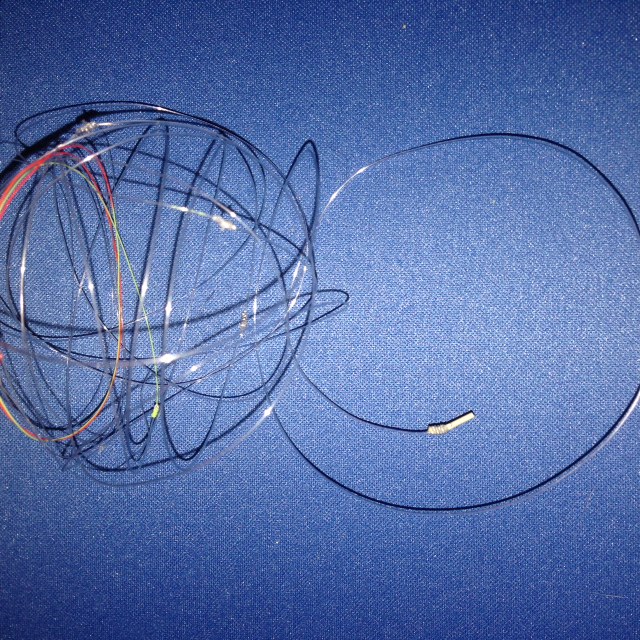
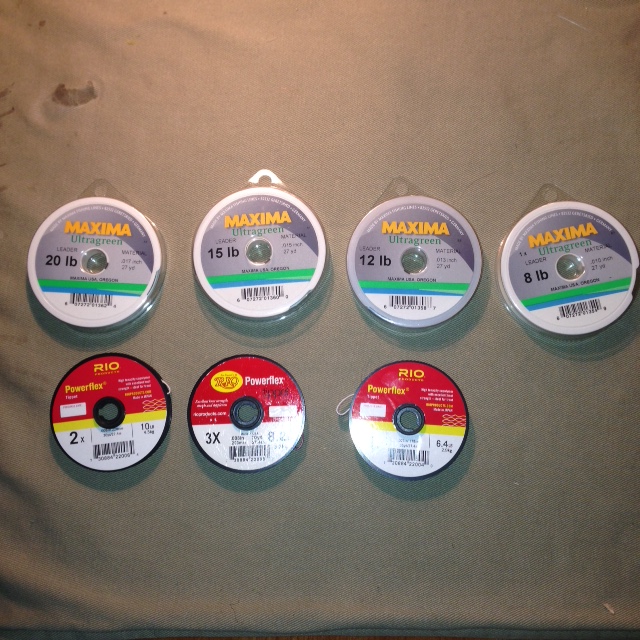
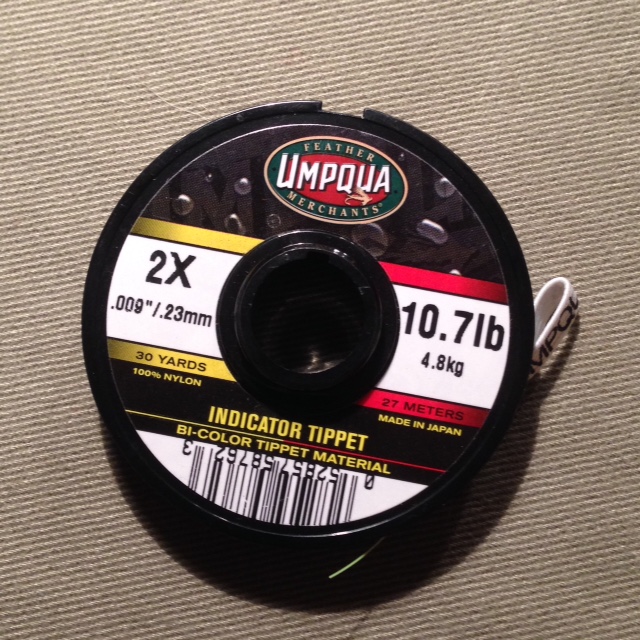
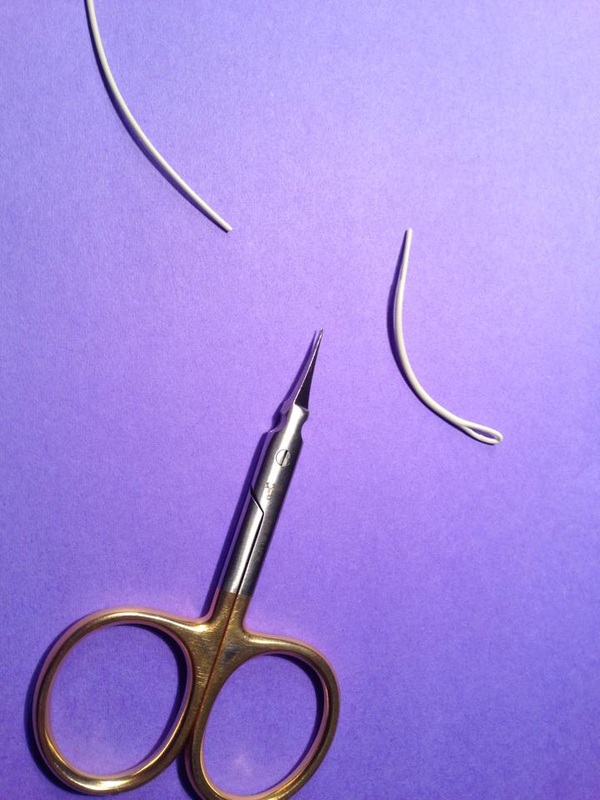
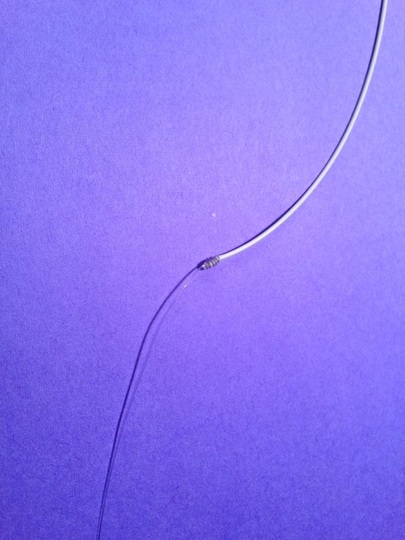
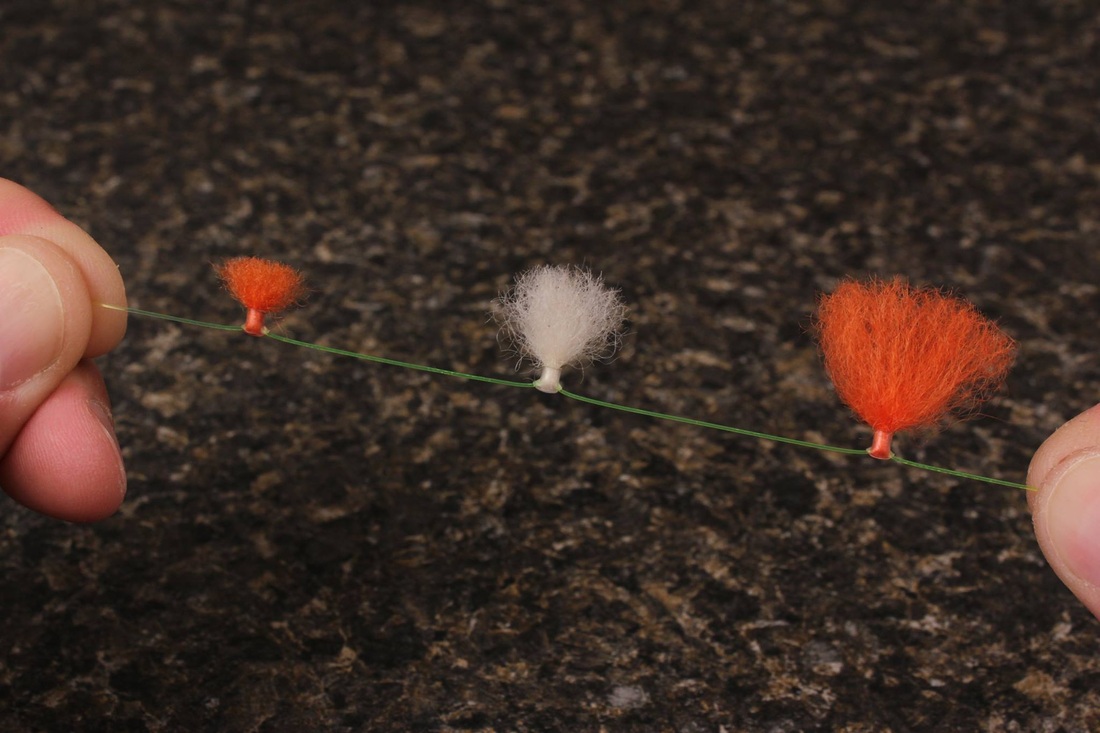
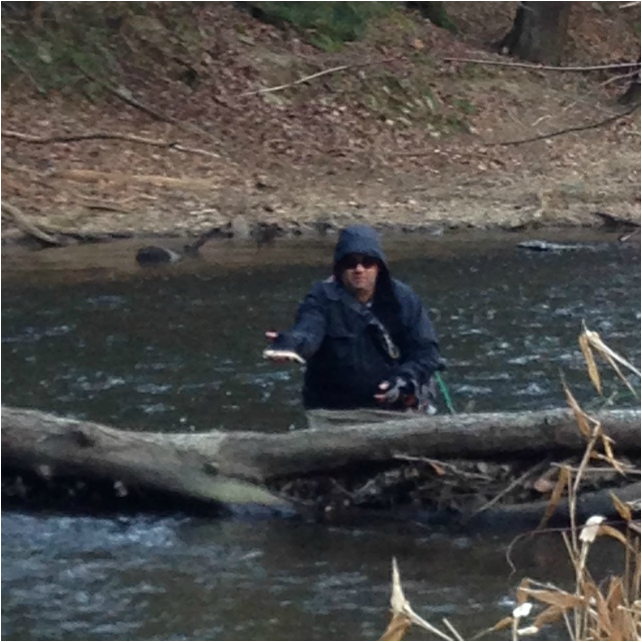
 To say that George Harvey was an accomplished fly fisherman might be the biggest understatement ever uttered by man. From pioneering and instructing the Penn State fly fishing coarse, to his books and writings, George's fingerprint is firmly stamped on the fly fishing world as we know it today. Known as one of the true giants of Central Pennsylvania fly fishing, George's aka-lades are far to broad to cover in one blog post. I would, however, like to talk about his infamous "Harvey Leader" Next to the fly line itself, your leader may well be the most important piece of equipment you use. I find it funny that one of the most important things is often one of the most overlooked. Your leader serves several purposes as it relates to fly casting and presentation. First, it must be stiff through the butt section to allow for a smooth transfer of energy. This will allow for good "turn over" when fishing a long leader with a dry fly, or chucking a heavy Nymph rig. The middle section must continue the energy transfer, but the materials need to be a little softer and more supple as we move toward the tippet. Finally, the leader must land with enough slack to achieve a good drift. Eric Stroup talks in depth about the Harvey Leader on his web site "Face Time Fly Fishing" Anyone reading this that is a Trout fisherman should check out his site and join. There is a wealth of information on there for the beginner as well as the seasoned veteran. After hearing Eric talk about the importance of leader design and function I decided I would tie a few up and reserve judgement until I fished the Harvey Leader system for one full year. In January of 2014 I tied my first leader on and fished this leader system for one full calender year (Trout fishing) and the results were eye opening. But before we get to that lets talk more about the leader itself. the formulaThe formula has been tweaked over the years I am sure. Advancements in monofiliment material have aided in better leader construction, but the premise of the design has stayed the same. Basically what we are doing is building connecting sections of monofiliment ranging from 10 to18 inches in length. The length of the section depends where in the system the particular section is. Each section is an average of .002 (two thousands of an inch) smaller then the previous section. It sounds complicated, but really it is not. Here is the table I am currently using for my leader construction. .017 20 LB. Maxima Ultragreen 10" .015 15 LB. Maxima Ultragreen 18" .013 12 LB. Maxima Ultragreen 18" .010 8 LB. 1x Maxima Ultragreen 18" .009 10 LB .2x Rio Powerflex 12" .008 8.2 LB. 3x Rio Powerflex 18" .007 6.4 LB. 4x Rio Powerflex 18" You will notice as we switch from the Maxima to the Rio Product the "pound test" actually goes up. This is due to the fact that across the board Rio's tippet is stronger than their competitors in the same line diameter. One of the reasons I like the Rio products. Don't worry about the pound test, what we are looking for is the average of the .002 taper through the hole leader system. If you research this online you will see many people recommend to use the Maxima Chameleon product (the brown Maxima). I have found the Ultragreen to be plenty stiff enough and I believe it knots easier than the Chameleon. All sections are connected with Blood Knots. This is my basic leader that I start with. Depending on the situation I will start here and add tippet to the 4X section. If I am fishing a Nymph rig I will usually tie the first nymph onto the 4X section and tie the rest "truck and trailer style" to complete my rig. If I am fishing a dry or a dry and dropper set up I may start on the 4x section depending on the dry fly. If I need to go to 5X I will knot 24 inches of 5X to the 4X section. If I need to go to 6X I will knot 18 inches of 5X to the 4X and then tie 24 Inches of 6X to the 5X section. You can see we are keeping the taper throughout the system. Although all of the measurements are approximate A quick addition of the sections and you will realize if you are fishing 6X you are on a pretty long leader. Usually if you are on 6X you are fishing a pretty small dry fly (usually 18 or smaller). With a little practice and proper casting technique you will be surprised how easy this leader turns over. One modification I have started doing is incorporating in a "sighter" into the system. A sighter is a bright, highly visible piece of material that can be used as an indicator while Tight Lining. I like the Indicator Tippet from Umpqua. It is two toned, red and green, it sticks out like a sore thumb, and it knots easily with the Rio products. I tie my sighter in the 2X section. If you look at the first picture in the post you can see the sighter coiled in with the leader. I leave the sighter in the leader even when I am fishing dry flies. This December I was hooking fish on 6X using a #24 CDC puff Midge pattern with the sighter in the leader system. It doesn't seem to bother the fish. You will have to wrap your brain around this next paragraph... Every time I read an article about this leader system there was one common theme throughout. EVERYBODY that I talked to or read said the same thing..."off with the loop" I will admit I had a hard time with this at first. I mean, who in their right mind would cut a perfectly good welded loop of a brand new $80.00 fly line? Welded loops have come a long in the past several years. They are smaller, more streamlined, and don't pull out like they used to. They are ,however, not without fault. They will still hinge and eventually crack at the weld point. They land harder on the water than a nail knot, and most importantly, they will not go through the guides smoothly especially under pressure, like... when you are trying to land fish! For these reasons I do recommend at least trying a nail not connection. Try it to an old fly line first to see if you like it. If you give it an honest try I think you will find out, as I did, the nail knot is superior to the welded loop. Pluses and minusesAs I said I was going to reserve judgement until after I fished the leader for one full year. For the entire Trout season of 2014 I fished the Harvey Leader. The biggest plus I found is I fished the SAME Harvey Leader for one full year. That is correct, The first leader I tied on and landed my first fish of 2014 (a wild Brown from Valley Creek) is the leader at the top of this post. The 3X through 6X sections were rebuilt countless times, that is to be expected. I believe the 2X sighter was re-tied twice. Other than that I fished the same leader the whole time. Fishing the same leader has 2 huge benefits as I see it. First off extruded leaders are around $5 a pop. Typically I would go through at least a few of these a year, most people probably more. So financially this system can be a big benefit. More importantly if you use the same leader for all of your fishing be it, Indicator Nymphing, Tight Lining, Dry and Dropper, Streamer or Dry Fly fishing (I used this leader in all of these situations) you become very familiar with the performance of the leader and your presentations will improve because of it. Less time switching leaders means more time fishing, always a plus. I absolutely believe I was achieving better drifts which in turn meant more takes and I was able to fish longer leaders and still achieve proper turnover. I kept hearing people say "the knots will snag on debris and will pick up dirt from the water". I must say I really didn't find that an issue. You will have to learn to tie blood and nail knots. Honestly, if you are past your first year in the sport you probably should have already acquired these skills. The only real negative I found is sometimes if I am fishing streamers I like to attach a small sink tip to my fly line. Usually two feet of T8. If you cut the welded loop off this becomes impossible.
Well, there you have it. My feelings on the Harvey Leader. When I look back on the past year there are many thoughts and reasoning's about why to continue to fish this leader. The bottom line is that I truly believe this leader helped me catch more fish. I fished with confidence and that is a huge asset. That being said I will continue to fish the Harvey Leader system for all of my Trout fishing until I find something better. Till next time... Tight lines If you would like to hear more about this or to talk about all things Fly Fishing please stop by my booth this weekend at Cabela's Captain's Weekend. For more info click here. I look forward to talking with you.
5 Comments
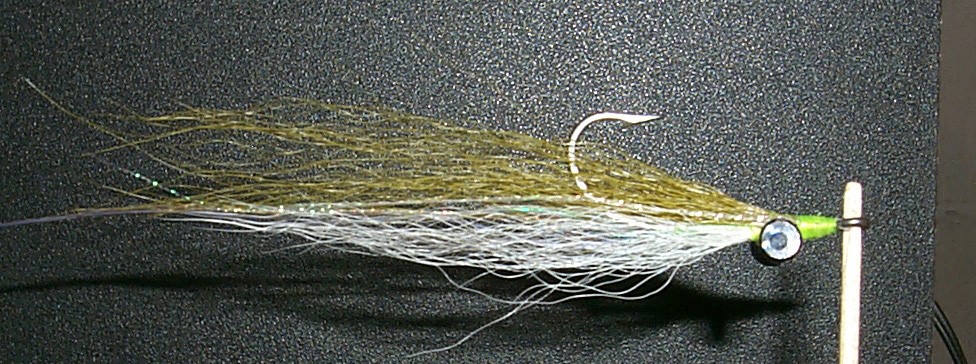
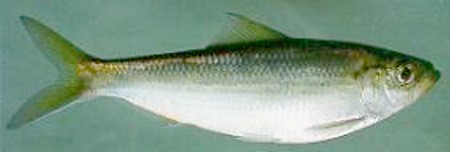
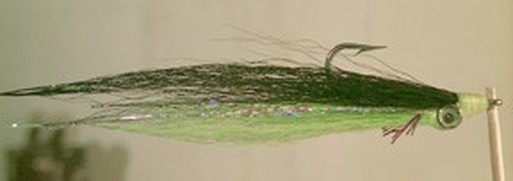
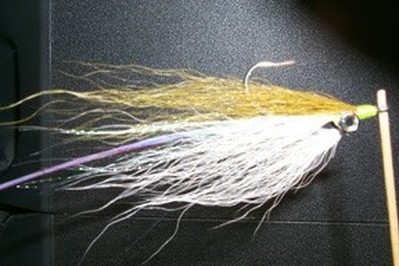
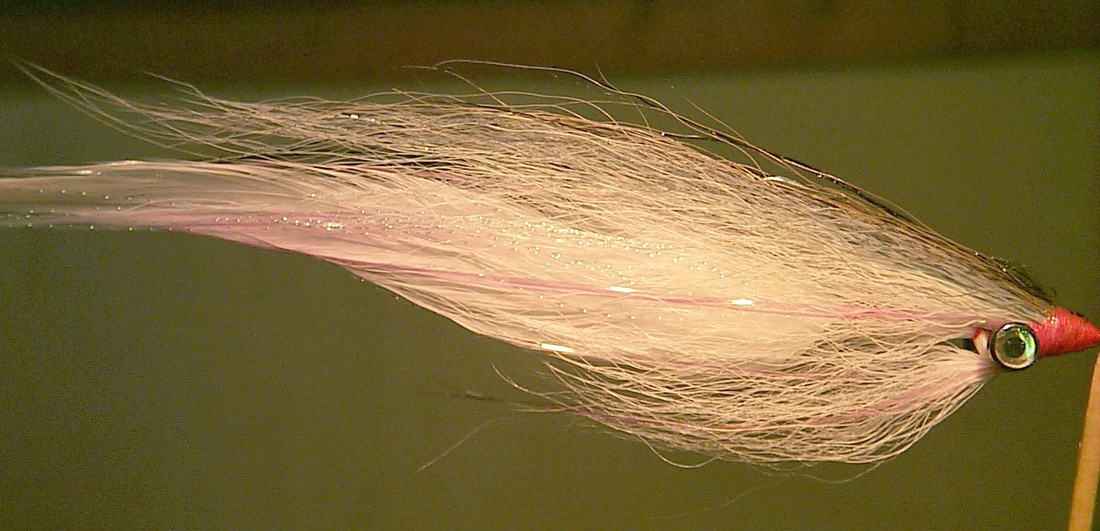
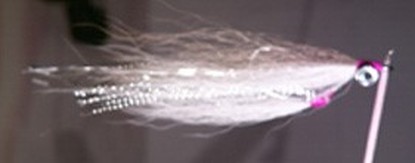
 The Cabela's store in Christiana DE. is hosting an event Saturday, February 28th and Sunday, March 1st. "Captains Weekend" is a great time to get out, shake off the cabin fever from this brutally cold winter and get ready for the spring season. If you are looking to plan a trip out on the Bay this spring, want help fishing the river or you are looking forward to the many fresh water opportunities we have in and around Delaware you won't want to miss this event. Professionals will be on hand to answer all of your questions. I am proud to announce that "Irish Flies" has been invited to be part of this great event. I will be there Saturday and Sunday from 10:00 am till 4:00 pm. Please feel free to stop by, introduce yourself and let's talk some fishing. For more information you can visit Cabela's web site here. I look forward to seeing you next weekend. Until then... Tight lines  It is funny the things you come across in your email. All of the regular readers of this blog have heard me mention my buddy Rick. Rick is a friend, mentor and has taught me much of what I know about this great sport. Recently I came across this paper Rick had written for the now defunct "Austin Reed Outfitters". He was trying to email it to a mutual friend. Rick did not have our buddies email address, so he sent it to me and asked me to pass it along to the intended recipient. After reading it I knew I had to share it. I asked Rick if I could post it and he said sure. Keep in mind this was well before websites, blogs, social media and well before it was "fashionable" to write papers about fly tying techniques. The date on the paper was April of 2001, almost 15 years ago. Here it is, UN altered and in it's original format. The pictures are the originals too. I hope you enjoy it as much as I did. Yes Virginia; Although Many of us claim to have had a religious experience while fishing. It’s mostly jetty fisherman after being swept into the suds. The relation of bait-fish shapes to fly tying styles is not written on stone tablets carried by a fly fishing sage down the beach. Easy to tie, effective patterns like the “Clouser Minnow” aren't limited to looking like everyone else’s Clouser to be effective. They can represent bait-ish with deep profiles with out sacrificing the balance and performance or color of your favorite chartreuse and white fly. Clousers minnows are usually slim with narrow profiles. Their cross sections are like an inverted triangle where the top wing is greater in volume than the bottom. This design aids in tracking like keel on a boat. And has proven successful in a variety of waters worldwide. With such success you may ask why change? Ask yourself “why not?” and “Does it represent the silhouette of the fish present where and when I fish……………………… …….. Only sometimes? Currently the Clousers are promoting a weigh loss program.. At least for their flies, with a slim or sparsely tied style. In contrast, they can be dressed to imitate deeper belly fish like peanut bunker, herring, alewives, and shad. This can be achieved without becoming bulky or adversely changing their action in the water. Depth can be added to the profile with the addition of a 2nd narrow and shorter underwing. Begin by tying the wing butt behind the hook eye as with the first underwing. Next secured it with figure 8 wraps around the dumbbell eyes. Note! that when the Figure 8 wraps secure the underwing toward the bend in the hook the profile achieved is narrower. If you look behind the eyes in the above photo You can see the wraps securing the 2nd chartreuse underwing. Securing the 2nd underwing more toward the hook’s eye on the dumb bell will create a greater depth of profile. Above the wing is secured at an angle and the separation is apparent behind the dumbbell eye. Additionally, the flare of the material will be controlled with the tension used to tie the material. Tying everything else remains the same. And hopefully you won’t end up with a paintbrush in your attempt to create a broader profile fly. The flies inherent performance will remain the same as long as the triangular cross section is maintained. More simply put” tie sparsely on the bottom and heavier on the top”. You can apply this to your “Half and Half's” and achieve a real change in the perceived size of the fly. However, it will continue to be just as easy to cast. The separation of the under wings is visible in the above photo. The 2nd underwing is attached almost at the bottom of the eye. While the first is attached behind the eye. The materials, and hook styles can be changed. Do so with and objective and you’ll probably be successful. Other variations include flash tops and the use of Keel hooks. Using these technique, you can modify your Clousers to to achieve Butterfish and Spot profiles by adding a 3rd wing. But, that is another article and you just got enough to do with this one. A testimonial, “This tying style requires more time to tie and uses more materials.” “The Flies work on “Rockfish” when the fish are deep and the prevalent bait-fish are of a broader profile.” “Big Flounder like them in the heat of the day mid summer". Rick Bender It is kinda cool when you can write your thoughts almost a decade and a half ago and the techniques are as solid today as they were 15 years ago. I am glad I had the opportunity to share this with everybody, and I want to thank Rick for allowing me to do so. Thanks buddy! Till next time...
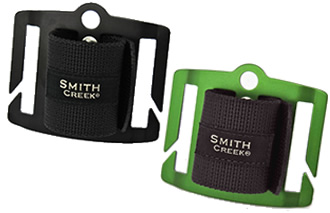
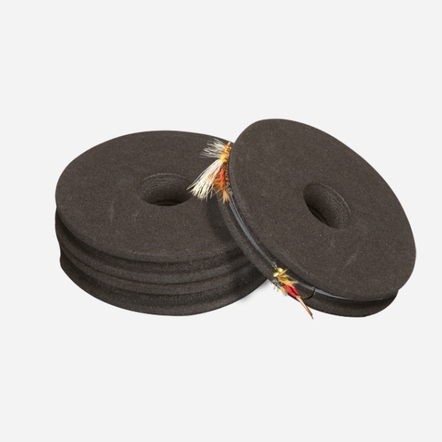
Tight lines  In thinking ahead to this weeks post it was originally going to be a post about a few of my favorite accessories that have become staples in my fishing. As the end of the weekend drew closer and I continued to watch the weather I realized I may actually get out on the river this Sunday. Several factors have kept me off the river for almost a month. We have been extremely busy at work. I just finished a stretch where I worked 13 days in a row and 19 out of the last 20. Don't get me wrong, I am in manufacturing and after 2007 thru 2009 I will never complain about being busy ever again! Poor weather (downpours, not cold), the Somerset show and my work schedule just didn't allow for much fishing time, but that was all going to change on Sunday. I spent Saturday evening prepping my gear. Several new products from Loon Outdoors had come in and I was anxious to get them in the mix. I was really looking forward to using the Rigging Foams. I tied up and attached a new Harvey leader to my freshly cleaned fly line , I refilled my tippet "T" and by 7:00 the truck was loaded and ready to go. I finished in time to enjoy a movie with my wife. BTW "The Judge" with Robert DuVall and Robert Downey Jr. is worth a watch. Well, here I sit on Sunday night and based on the results of my day on the water it looks like we will be moving ahead with the "Accessories" post! Seven hours on the water and ZERO fish. I didn't have a take or even move a fish for that matter. Also, I would like to find the weather person that was predicting temps in the 50's and have a behind the barn talking with him! They couldn't have missed it worse if they tried! The water never got over 33 degrees! My phone said the air temp was 48 and I have a hard time believing that. I talked to several other fly fishers and everybody had a similar story. Cold air, cold water and no fish. I guess you have to have days like this every once in a while. It helps to keep your ego and your hat size in check. Plus, it is days like this that make the really good days seem so much better. But enough of that, on to the accessories post. "There he stood, knee deep in the river draped in enough gear and gadgets that would make a telephone lineman envious". "He was trying to outwit a creature with a brain the size of a pea and getting licked in the process". I read that some time ago. I don't remember where it was, probably on a T-shirt or a bumper sticker. I remember laughing at the time as I thought it was funny, the more I thought about it the more I realized this may be one of the truest statements in the world of fly fishing. Isn't it ironic that while we like fly fishing for the "grass roots" aspect of the sport we bog ourselves down with tons of gadgets and gizmos. Some of which we seldom if ever use. We all have seen the guy on the river that looks like he has just stepped out of the Orvis catalog. Usually you can hear them coming with all of the clinking and clanking of the multitude of things hanging off of their vest. I often wonder how many of these things actually improve their fishing in some way? A quick look at the latest mail order catalog shows that almost 20% of a 135 page flier is dedicated to "accessories", so it is easy to see how we can get caught up in the hype. When I was working in the fly shop I was amazed at how easy it was to sell accessories. Some of these are solid, well thought out pieces of gear that can really help improve your time on the water. Unfortunately, some of these doodads are just plain junk whose sole purpose is to lighten your wallet. I have three great products that I would like to talk about that have become staples in my fishing so much so that I wouldn't go on the river with out them. Smith Creek is a New Zealand based company that have come up with an ingenious way to carry your landing net. For most, carrying a net while fishing is a hassle. With all the advancements in nets by companies like Brodin and Fishpond, it is about time somebody came up with a good way to carry one. I vividly remember an afternoon in south central PA when my brother had a net hooked to the D ring on the back of his vest. He went through some briars and the net bag got caught. As he continued to walk the shock cord eventually stretched to the max and something had to give. The net came zooming out of the briars and crowned my bro right in the back of his head! Now I did ask him if he was OK, but I was laughing when I did. He totally lost his mind and took the high dollar net and smashed it on a log over and over until it had been reduced to a pile of tooth picks, a UN-usable net bag and a stretched shock cord. Must be that Irish temper...at any rate if he had a Smith Creek net holster that may not have happened. I have been using the Smith Creek holster for over a year now and I am convinced that, so far, this is the best way to carry a landing net. I would recommend to get a wading belt that is as wide as the buckle and a longer handle net seems to sit against my back a little better. Check out the Smith Creek web site here for more information and product videos. you would be glad you did. The second product I am going to talk about just happens to be another New Zealand based company. (my sub conscious must be kicking in because New Zealand is on my bucket list!) Anybody who fishes for Trout should know how to Nymph. One of the most important parts of a Nymph fisherman's gear is a good strike indicator. I am here to tell you the New Zealand Strike indicator is one of the best, if not the best, I have ever used. A strike indicator must possess several inherent qualities to make it worth while. It must float like a cork and suspend your nymph rig properly. It also must be visible, cast relatively easy, adjust quickly on the leader WITHOUT kinking the leader, and land in the water without spooking fish. In the past you had to settle for three or 4 of these criteria, but it was hard to get all six. When you realize the New Zealand indicator is actually adjustable in size this indicator goes 7 for 7 of the criteria list. Like the net holster I have been fishing this indicator for over a year exclusively and I am so sold on it's versatility that it is the only indicator I carry! For more information, to see some great pictures and instructional videos visit the New Zealand Strike Indicator website here. Irish Flies is now a distributor for this great product. Please feel free to contact me for more information or to purchase. The last product I would like to talk about is relatively new on the market. The folks at Loon Outdoors have come out with a product that is sure to be an instant classic. I am a Nymph fisherman at heart. I just love the Nymphing game. There is something magical when you set up after the indicator twitches and as you come tight you feel life on the other end! I love it every time it happens. Well, putting together the pieces of that puzzle can take a little bit of trial and error. Is this an "attractor" day or will they be eating naturals? Is an indicator rig the best option or would a Dry and Dropper rig be a better choice. What stage of what bug are they likely to eat today? All of these are questions we ask ourselves each time we hit the river. Sometimes we are lucky and we get it right on the first rig we tie. More often it takes a few tweaks to get dialed in, especially if we haven't been on the water for a day or two. All of this rigging can take time, especially if you are fishing three flies (check local regulations for the maximum number of flies allowed on your rig) and time spent rigging is time not fishing. What if there was a way to pre rig your flies for the day? Fast forward to one of Loon's newest products, the Rigging Foam's. Now you could tie up an 'attractor rig, a dry and dropper, and a "natural" rig all in the comfort of your house the night before you plan to fish. You then can store your pre tied rigs on the Rigging Foam and with one knot you can go from a triple Nymph rig to a dry and dropper. More importantly you can go back to the triple rig because you don't have to cut it apart, you can use the foam you took the dry and dropper rig from and store the triple rig. This saves time, tippet and most importantly you are only tying one knot each time you change! Mirroring the size of the most common tippet spools these disks can be easily stacked and carried on a tippet T or similar device. Having pre rigged options is sure to raise your Nymphing game to a new level. For more information you can visit the Loon Outdoors website here.
I hope you give these products a try, I believe if you do you will be happy with the results. If I didn't believe in them you can bet I would never endorse them and put them up on my site! Till next time... Tight lines  There is an old adage that says "If you surround yourself with successful people you too will be successful". I absolutely believe that success is contagious among people. I also believe that holds true for businesses. I am happy to say I have partnered with three great, successful companies that are staples in the fly fishing industries. Click on the logos to visit each companies web site,  Since inception in 2008, Flymen Fishing Company has firmly focused on introducing ”next generation” fly fishing products and materials into the market as well as designing innovative flies for use in both fresh and saltwater environments. With great products like Fish Skull, Sculpin Helmet, and Fish Spines the Flymen companies products have become a staple in my fly tying. Check out my Signature Patterns and you will see several of their products. Innovation in fly tying is a goal for me and the addition of the Flymen brand will go a long way in achieving that goal.  Anyone who ties flies knows one of the most important aspects of fly tying is thread tension. Weather you are tying midges with 17/0 thread or spinning Deer hair with 210 mono cord, thread tension is paramount. The Rite™ Bobbin is the only super-functional, micro-adjustable-tension fly tying bobbin on the market today. Whether you're a beginner or a pro, our bobbins deliver maximum thread control thanks to a unique brass tension wheel and top-quality components. Five bobbin models offer you just the right tool for the job, all made right here in Southwest Montana.  For our next product we move away from the tying bench and onto the river. I am convinced if you want to be a successful Trout fisherman you must know how to drift a Nymph. One of the most important pieces of a Nymph fisherman's gear is a quality strike indicator. I have been fishing one indicator exclusively for the past year. For the entire 2014 season I fished the New Zealand Strike Indicator. This indicator has served me so well that I have taken all the other indicators out on my vest. From #22 midges to Tungsten beadheads, the New Zealand Indicator suspends them all. All three of these companies products are now available through "Irish Flies" If you are interested in purchasing please use the links at the bottom of the page to contact me and I will get your order out ASAP. As always I appreciate your continued support. Until next time...
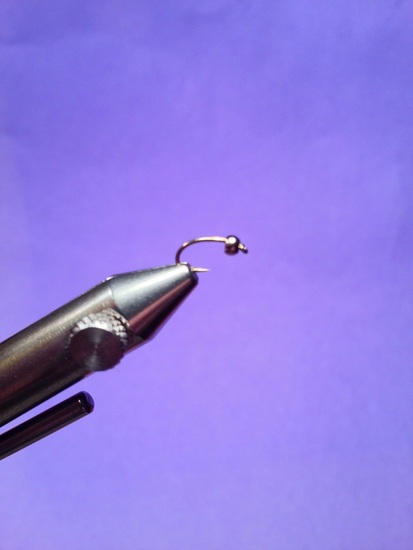
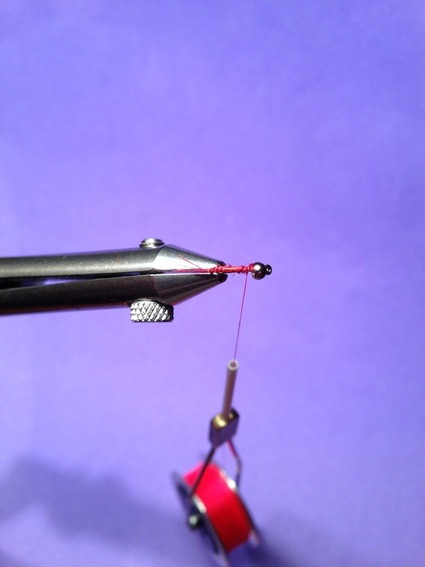
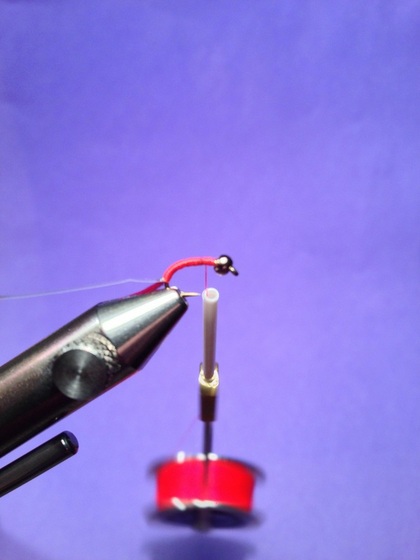
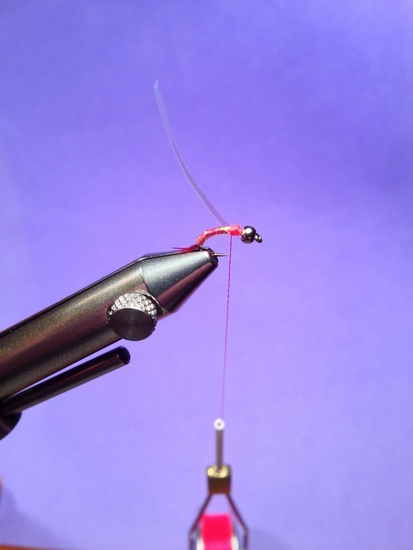
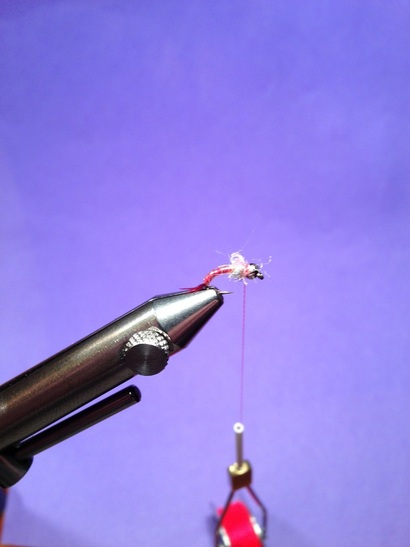
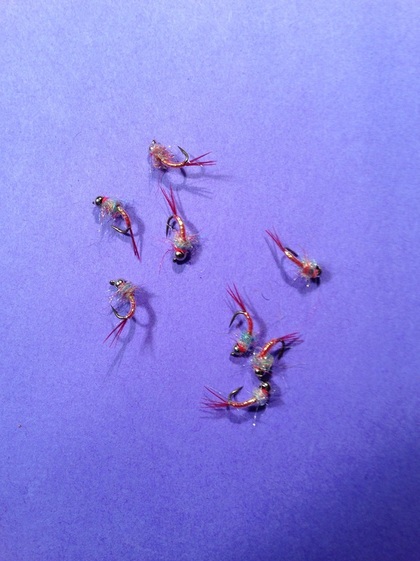
Tight lines  In my last few blog post's I have mentioned a specific fly several times. This fly has become a staple in my winter time fishing. My buddy "One Boot" Ed had a banner day on Maryland's tough Gunpowder during the first day of 2015. I have had several recent requests to do a step-by-step of the "Rainbow Warrior". The "Warrior", as we have come to call it, has served me well on stocked water as well as wild Trout rivers. I first came across this pattern in the great book "Dynamic Nymphing" penned by George Daniel. Mr Daniel credits Lance Egan for the pattern and I feel the need to personally thank him for such a great fly. Tied as big as a 12 or as small as a 22 this fly can be used strictly as an attractor or as a spot on Midge Larva. Hook: TMC 2457 #12 to #22 Bead: Silver Tungsten sized to match hook Thread: Red flat waxed 6/0 Tail: Pheasant Tail Fibers Body: UTC Pearl Tinsel Thorax: Rainbow Sow - Scud Dub Wing Case: UTC Pearl Tinsel Bead the hook and place the hook in the vise. After attaching the thread wrap back around the hook bend. Tie in a small clump of PT fibers for a tail. The original calls for natural Pheasant, I have been using red and have come to prefer it for this application. After tying in the tail, tie in a length of UTC pearl tinsel. UN-twist the thread (this is why I like flat waxed thread)and lay down a smooth, tapered under body. Wrap the tinsel up the hook over the red thread. When you get approximately 2/3 of the way up the hook shank tie off the tinsel, but don't clip the excess off. This will be your wing case. Dub a small abdomen with the rainbow dubbing. Fold the excess tinsel over the abdomen, centered and on top of the hook shank. Use the thread to build up the gap between the bead and the dubbing. Whip finish and clip the thread. Here is a brace of Warriors ready for the box and the water. Check out this nice Gunpowder Brown my buddy Ed stuck on New Year' day. Take a minute the next time you are at the bench and tie up a few Rainbow Warriors. I'll bet you already have all the materials in your stash. Based on the success I have had with this pattern you will be glad you did. Till next time...
Tight lines |
Archives
May 2017
Categories
All
|
© COPYRIGHT 2016. ALL RIGHTS RESERVED.

